Flashing doesn’t seem like much when you look at it – just a thin strip of metal, right? But when it fails, everything around it starts to go downhill. Water sneaks in. Walls get soggy. Mold shows up quietly. And you wouldn’t believe how many leaks we’ve traced back to flashing that either wasn’t installed right or just gave up over time.
I think a lot of building owners – especially the ones managing commercial spaces – assume flashing is a “set it and forget it” part of the roof. But like anything exposed to snow, rain, UV, wind, and freeze-thaw cycles, it breaks down. It lifts. It rusts. And eventually, it stops doing the one job it’s meant for: keeping water out of the places it shouldn’t be.

It Starts With Tiny Gaps… And Gets Worse From There
The number one issue? Separation. Whether it’s flashing/ pulling away from the chimney, lifting around a vent, or peeling back at the edge – those small gaps are where things start. Water doesn’t need a wide opening. A hairline crack in sealant can do it.
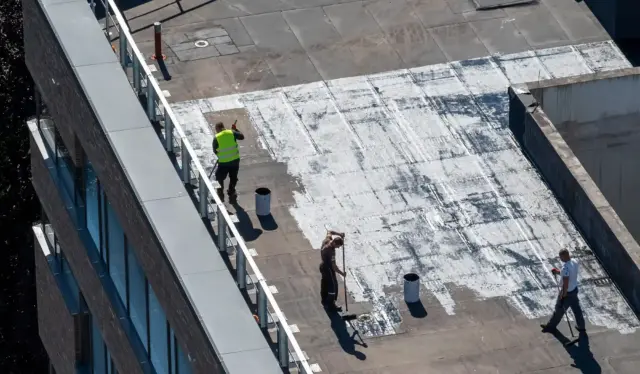
We see this all the time during flat roof inspections. Sometimes it’s just sealant failure. Sometimes the metal’s warped from heat or frozen in place by ice that expanded and contracted one too many times. Whatever the case, water finds it. And then it sits, soaks, drips into drywall or insulation. Not immediately. But give it a few months, or a season, and you’ll see it in the ceilings or the corners of rooms.
If the issue is minor, you might be able to re-seal and monitor it. But most of the time – especially on older roofs or where the flashing was installed with the wrong gauge or wrong fasteners – it needs a proper reset. That means removing the section, checking what’s underneath, and reinstalling it with the right overlaps and back-up waterproofing.
Improper Installation Happens More Than You Think
You’d assume professional roofers always get flashing right. But… no. We’ve seen brand-new installations on commercial roofing systems where the flashing was literally nailed in without any sealant. Just gaps left open. Or worse, incompatible materials – aluminum flashing on copper plumbing vents, which causes galvanic corrosion.
Other times, the flashing’s there, but it’s too short, too narrow, or not secured to anything solid. Wind gets underneath it, lifts it, and the next time it rains? Water bypasses the whole thing. If you’ve had flashing installed recently but you’re still getting leaks – especially after high winds – it’s worth having it checked again. A second opinion can save a lot of long-term damage.
One client in Scarborough had us redo an entire row of roof-wall flashing because the original crew didn’t run the flashing up behind the siding. It just ended… halfway up the wall. Rain had been seeping in for over a year, ruining the sheathing. Cost them triple what it should’ve. Preventable stuff, honestly.
Corrosion, Rust, and Weather Damage
Flashing takes a beating. It’s exposed 24/7 – sun, rain, snow, ice, all of it. Even the best flashing metal won’t last forever, and once corrosion sets in, it spreads. Especially if the protective coating wears off. Once rust forms, it can eat straight through the metal, leaving pinholes that aren’t always visible until things get soaked inside.
In areas with regular freeze-thaw cycles, even small defects in flashing can lead to expansion cracks. Snow melts, seeps into micro-cracks, then refreezes and expands – just like potholes on the road. Over time, those gaps widen. And if that flashing was protecting a low-slope transition, like where a flat roof meets a parapet or exterior wall? That water will pool and sit until it finds a path inward.
After a big storm or rough winter, it’s smart to book seasonal maintenance just to catch this kind of damage early. We’ll usually clean the area, reseal the edges, and – if needed – swap out damaged pieces. Most flashing repairs aren’t expensive unless you wait too long. Then it’s not just flashing – it’s membrane, insulation, framing, sometimes drywall.
Sealant Failure… the Silent Leak Creator
Even when the metal’s fine, the sealant that protects the edges and seams will age faster. UV rays break it down. Snowmelt washes it out. And eventually it turns brittle or just flakes off. We see this around skylights all the time. The flashing is intact, but the sealant at the curb joint is gone – and suddenly there’s water between the skylight and the roof deck.
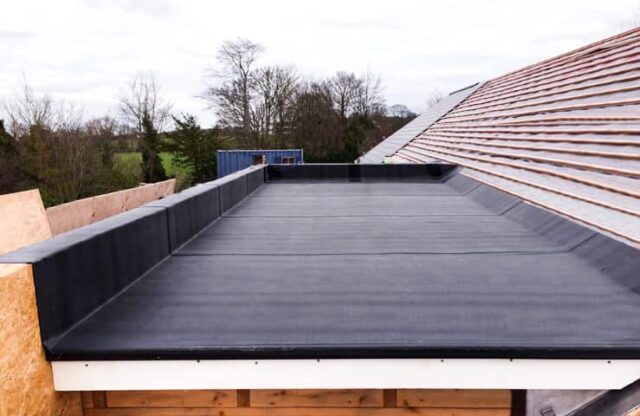
If you’re using membrane roofing like EPDM or TPO, this gets even more critical. The flashing has to be welded into the membrane or chemically bonded. No shortcuts. Any gap creates a pressure point for wind or water entry. And we know what that leads to.
Even just walking the roof twice a year and looking closely at the flashing can prevent all this. Or having a team do a spring/fall maintenance check. We offer both, and it usually takes less than a couple hours per visit. It’s boring work, honestly – but the savings add up.
When Replacement Is the Smarter Call
Not everything can or should be patched. If you’ve had multiple leak events near the same chimney, wall, or skylight? It’s probably time to stop applying sealant and just rebuild the detail. That means removing the old flashing, inspecting the substrate, and reinstalling everything from scratch. New flashing, fresh underlayment, sealed and reinforced the right way.
It sounds like more work than it is. For us, it’s routine. And if your flashing issues were part of a broader failure – like during a leak emergency caused by storm damage – we usually recommend upgrading the flashing in that whole section while we’re on site. It saves the callout fee later, and honestly, peace of mind is worth a lot when it rains for five straight days in November.
Also – important to mention – if your building’s using older galvanized flashing, you’re probably due for a material upgrade. Newer products resist corrosion better and can be sealed more easily with elastomeric coatings or modified bitumen.
If you’re curious about the technical side of how flashing is detailed and where failure points usually happen, this resource does a decent job explaining it: https://buildingscience.com/documents/information-sheets/common-flashing-details . This document provides practical illustrations and explanations that can help in identifying and mitigating common flashing issues.
Anyway, that’s the rundown. Flashing problems are small until they’re not. Most of what we fix could’ve been handled cheaper and earlier. So don’t wait for water stains or bubbling paint. If you haven’t had your flashing looked at in a while, book a roof inspection. You’ll know exactly where you stand – and what it’ll take to fix it properly.