
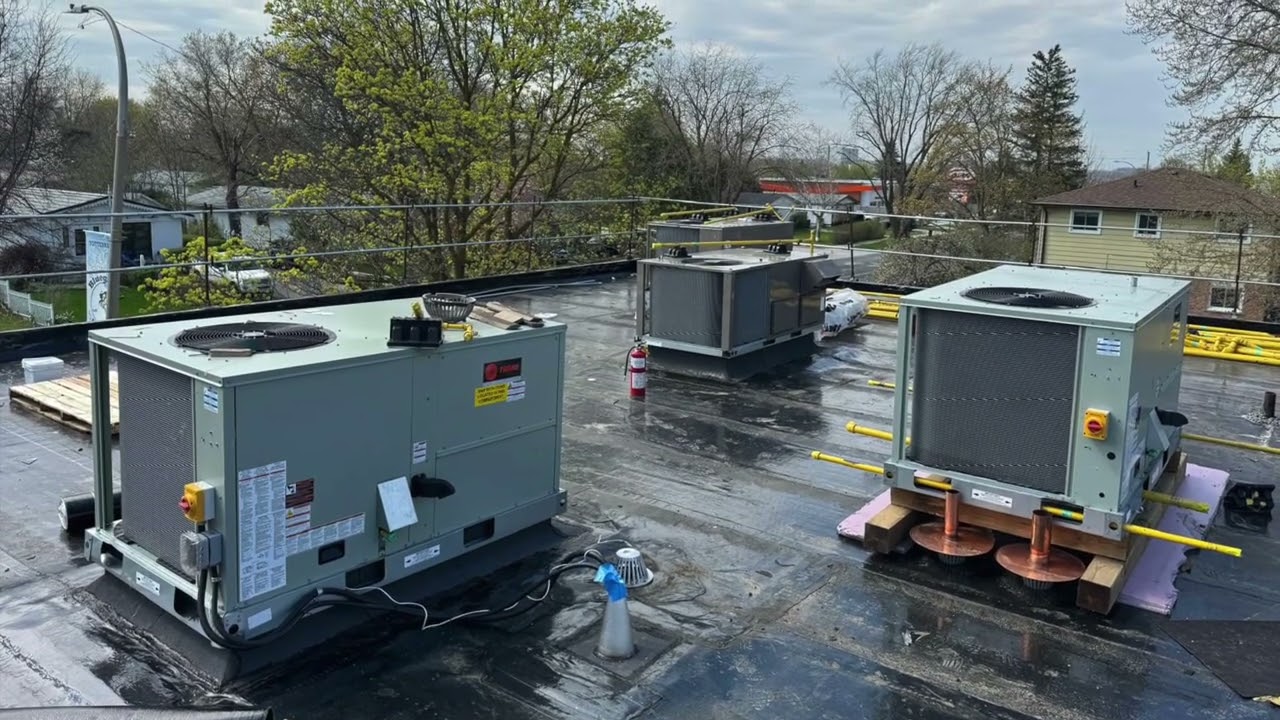
Owners look at the field of the roof. Water gets in almost everywhere else: shrunken pitch pockets, split corners at equipment curbs, compressed drain sumps, loose cap flashing at the parapet, and cuts left behind by other trades. These are small, tucked behind equipment, and none are visible from the ground.
Why does the open field get all the attention?
Because it is the part you can see. Stand at the roof hatch on a commercial building and what fills your view is a large expanse of membrane. If it looks continuous and dry, the roof looks fine.
But the field is the simplest part of the assembly. It is a sheet, laid in a factory-controlled width, with the fewest interruptions. The parts that fail are the transitions: everywhere the membrane stops being flat, changes direction, terminates against something, or has an object passing through it. Those details carry the most movement and the most site-built work, and they were assembled by hand on a roof rather than in a plant.
The other reason is access. Pitch pockets sit behind mechanical units. Drain sumps sit in the lowest point of the roof, often under water. Cap flashing at the parapet is at the far edge, past the safe walking zone. In other words, the failure-prone details are precisely the ones a casual look never reaches. That is why a proper flat roof inspection is a route through defined checkpoints, not a look around.
Pitch pockets and the small penetrations
A pitch pocket is a small metal sleeve set around an awkward penetration and filled with a pourable sealer. It exists because the item passing through cannot be flashed conventionally: an angle-iron support leg, a bundle of conduit, a guy wire anchor, a sign standard.
Pourable sealer shrinks as it cures and continues to settle afterward. It drops below the rim of the pocket, cracks around the item in the middle, and eventually leaves an open channel straight into the insulation. From two metres away the pocket looks exactly the same as the day it was poured. You have to stand over it and look down into it.
The same applies to the other small items nobody photographs:
- Vent stack collars, which crack at the fold and loosen at the clamp.
- Gooseneck hoods, where the flashing skirt lifts and the fasteners work loose.
- Conduit sleeves added years after the roof was built, often sealed with caulking instead of a proper flashed detail.
Pitch pockets are consumable by design. They need topping up or rebuilding on a schedule. Where one keeps failing, the right answer is usually to rebuild the penetration as a properly flashed curb so it stops being a recurring liability.
Equipment curbs and what other trades leave behind
Every rooftop unit sits on a curb, and the curb is where the flat membrane turns vertical. Base flashing runs up the curb face and the unit's skirt or a cap flashing sheds water over the top of it. Both have to be intact.
What we find on buildings that have not had the curbs looked at:
- Split corners. Corners take more differential movement than any other point on a roof, and they open first.
- Base flashing that has slipped or pulled away from the curb, leaving the termination bar and fasteners exposed.
- Fresh conduit, refrigerant lines or data cable cut straight through the flashing with a smear of caulking over the opening.
- Condensate lines discharging onto one spot of membrane, keeping that area permanently wet and growing biological matter.
- Units set down across a drainage path, damming water behind them.
Almost none of this is caused by roofers. It is caused by refrigeration technicians, electricians and telecom installers doing legitimate work, none of whom were told the roof is a finished waterproofing assembly. The single most effective control an owner has is a rule that nobody goes on the roof without notice, and that the roof is walked after they leave. Curb and flashing rebuilds are handled under roof flashing and siding.
Drain sumps, strainers and overflow provision
Owners check that the drains are not blocked. Far fewer check the three things around the drain that matter more.
The sump. Insulation around a drain compresses over years of foot traffic and saturation, and the drain body ends up sitting proud of the surrounding surface. Water then ponds in a ring around the drain instead of entering it. Clearing the strainer does nothing about this.
The clamping ring. The membrane is clamped into the drain body by a ring with a set of bolts. Bolts loosen, the ring lifts, and water passes under the membrane at the one place on the roof where water always arrives.
Overflow. If the primary drains block during a heavy rain and there is no functioning overflow scupper or secondary drain, the water has nowhere to go but onto the deck. That is a structural load question, not a leak question. Overflow provision is the detail owners are least likely to have ever confirmed exists.
Add to that scuppers positioned above the actual low point of their area, and crickets between drains that have filled with debris and stopped channelling anything. The full picture is set out in flat roof drainage systems.
Perimeter metal, coping and the reglet
The roof edge takes the highest wind uplift on the building, which is why fastener density is increased in the perimeter and corner zones. It is also the coldest strip of the roof in winter.
What gets overlooked there:
- Cap flashing and coping laps that have opened, with sealant gone hard and cracked at the joints.
- The reglet, the slot cut into the wall that receives the top edge of the counterflashing. Its sealant is a wear item and almost nobody checks it.
- Coping that has been set flat or sloped the wrong way, shedding water back onto the roof or into the wall instead of outward.
- Parapet masonry with open mortar joints and spalled brick. Water arriving through the wall produces ceiling stains that look exactly like a roof leak, and no amount of membrane work will stop it.
In a Toronto winter this is where ice damming does its work. Meltwater runs from the warmer field to the cold perimeter, refreezes at the parapet and around the drains, and backs up behind the ice until it finds the base flashing or the reglet. Buildings whose worst leaks arrive during a thaw rather than during rain are usually telling you about their perimeter.
What the roof surface is telling you
Even in the field, the useful signals are small ones that people walk past.
Granules in the drain strainer. On an SBS cap sheet, accumulated granules mean the surfacing is wearing away, and the surfacing is what protects the bitumen from ultraviolet light. It is an early indicator of remaining service life.
Bare patches in gravel. On a built-up roof, wind scour and foot traffic strip the aggregate and expose the bitumen directly to sunlight. Our piece on why flat roofs have gravel explains what that layer is doing.
Fastener heads showing through. Bumps or rust spots in a mechanically fastened membrane mean plates are working up through compressed, probably wet insulation. It also means the uplift resistance the roof was designed for has been reduced.
Footprints and dragged marks. A worn track from the hatch to the mechanical units is where punctures happen. Walkway pads exist for exactly that route, and most buildings do not have them.
A soft feel underfoot. Insulation that gives under a boot is wet or crushed. It is one of the few diagnostic tests available without equipment, and it costs nothing.
How do you cover this without walking the roof yourself?
You should not be walking a commercial roof to check these things. Roofing is high-risk work under the Occupational Health and Safety Act, open edges need guardrails or a travel restraint system, and the Ministry of Labour, Immigration, Training and Skills Development sets working-at-heights requirements for anyone up there. An owner walking an unguarded parapet edge in wet conditions is a genuine hazard, not a diligent one.
What you can do instead:
- Set a scheduled routine. Two visits a year, autumn and spring, with the details above as fixed checkpoints. That is what a commercial roof maintenance programme puts on a calendar.
- Get a baseline document. A condition report with the assembly confirmed by test cut, a moisture survey, deficiencies ranked by priority and dated photographs by location.
- Control roof access. A log of who went up, when and for what work. It is the least costly item on this list and it prevents the most damage.
- Keep the file. Year over year, the same locations photographed. Rate of change is what tells you whether the roof is stable or moving.
Owners and property teams running more than one building can standardise all of this across a portfolio through our property manager services. To get a baseline on a building in Toronto, the GTA or southwestern Ontario, call 416-456-0777.